Share this resource or email it to a friend!
The importance of providing environmental warmth for neonatal kittens cannot be overstated. The results of a 2025 study conducted by the University of Davis School of Veterinary Medicine (see Resource Section) suggested that housing kittens in warm conditions (90°F/32°C) and either 50% or 60% humidity optimized weight gain and survival, as well as minimized diarrhea. The study also indicated that kittens may grow best when fed consistently round the clock, rather than being fed more during daytime hours.
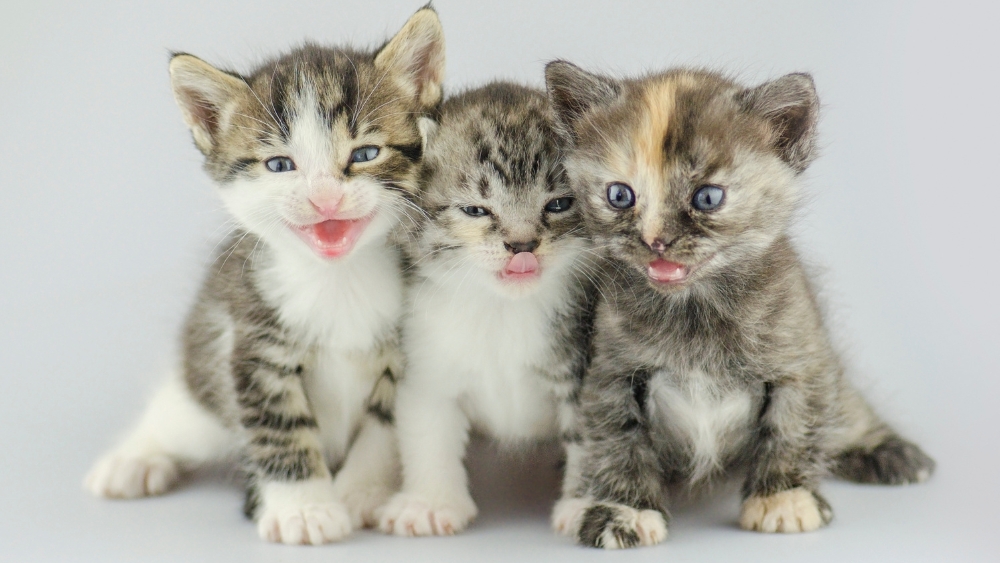
Until they are four weeks of age, kittens lack body fat and are unable to regulate their body temperature, so a consistent and safe heat source is critical for their survival. Normally, that essential heat source is provided by their mother and littermates; kittens huddle together to preserve body heat when their mother leaves the nest.
Adult cats seek out warmer areas and can shiver to help increase their body temperature. Kittens, however, cannot shiver for the first 7 to10 days of their life and thus cannot generate heat to stay warm.
Normal newborn kitten body temperature is between 97°F-98°F/36°C-37°C (rectal), with temperatures slowly increasing by one degree each week, reaching 100°F/38°C by four weeks of age. The temperature of an incubator must be appropriately regulated and kept constant as much as possible according to the age of the kittens.
- 1 week: 87-90°F/ 30.5°-32°C and 60% humidity.
- 2 weeks: 85-87°F/29°-30.5°C and 60% humidity
- 2-3 weeks: 80-85°F/26.5°-29°C and 60% humidity
- 3+ weeks: Move kittens to a larger area, and provide a heat source
Note: Some neonates require higher or lower incubator settings due to breed, body condition, and health.
Hypothermia is a state of dangerously low body temperature that commonly results in illness and even death because it leads to depressed respiration and heart rate, impaired immune function, and ileus (a condition where the intestines stop moving normally, preventing the passage of food, liquid, and gas). Neonates whose body temperature is less than 96°F/35.5°C cannot digest milk replacement formula. That is one of the reasons why they must be rewarmed slowly by one degree over 30-60 minutes until they reach a normal body temperature. Improper rewarming can lead to peripheral vasodilation, the widening of blood vessels near the surface of the skin. Vasodilation allows more blood at the skin’s surface, causing more body heat to be lost. In addition, the sucking reflex becomes affected at less than 91°F/32°C; kittens chilled to this level will not even attempt to nurse.
Providing heat can include the following:
- Heating pad
- Warming disc
- Incubator
Heating pads and warming discs will be discussed in more detail later in this article.
Note: Rice socks, warmed water bottles and heat lamps have not been included in this article as adequate sources of heat for the following reasons:
- Rice socks provide inconsistent heat and are unable to be disinfected
- Water bottles provide inadequate heat and there is a potential for leakage
- Heat lamps are extremely dangerous
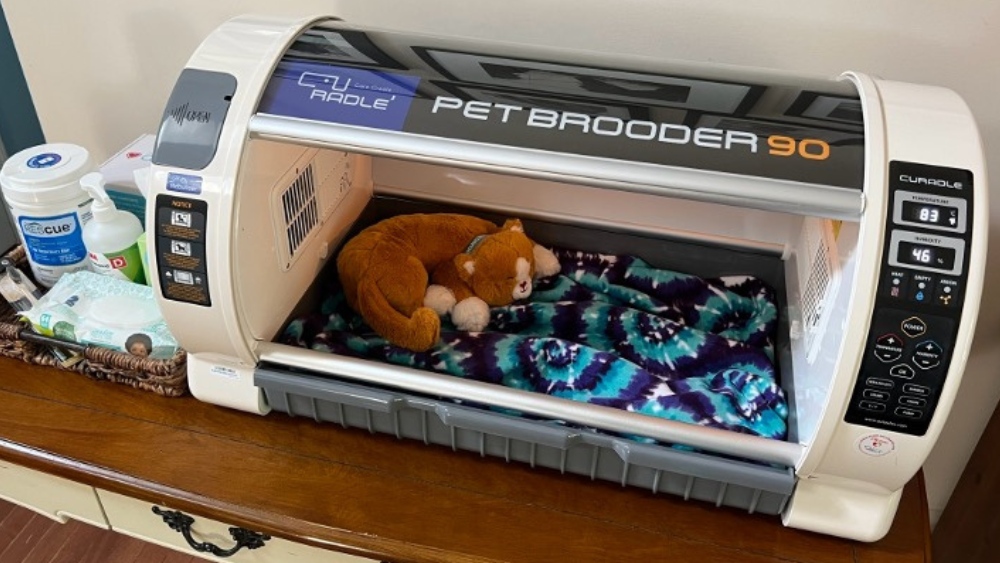
Incubators are an important consideration when fostering neonatal kittens. There are many options to consider when adding an incubator to your foster supplies. This article will discuss commercially available incubators as well as DIY incubators.
Why Choose a Commercial Incubator
The ideal housing for at-risk neonates is a commercial incubator with controlled temperature and humidity. Commercial incubators from a reliable company are considered the gold standard when caring for vulnerable kittens; these incubators increase the likelihood of their survival.
Animal shelters, especially those with kitten nurseries, use incubators to care for neonatal kittens, the most fragile population with high-mortality rates in shelters. Rescue organizations may provide incubators to their fosters who specialize in neonates. Veterinary and technician schools and veterinary practices may also have incubators for neonates in their care.
Some experienced fosters who regularly care for neonatal kittens, especially from birth to three to four weeks of age, may choose to invest in a commercial incubator. In areas where neonatal fosters are in high demand, they may hand over their kittens, who no longer need specialized care, to a foster caring for kittens beyond the neonatal stage. Doing so allows new kittens to get the special care they need from an experienced neonatal foster with an incubator.
To maximize neonatal kitten survival, consider commercial incubators with the following features:
- Nontoxic and durable. The incubator should be made of high-quality, non-toxic materials that can withstand frequent cleaning and disinfecting between litters.
- Easy to clean. The best incubators are made from materials that are easy to disassemble, clean, and disinfect to prevent the spread of infections between litters.
- Transparent side/s allow kittens to be observed without disturbing them, which is important for their development and monitoring. This feature avoids having to constantly open the incubator, disturbing the internal environment.
- Consider the size of the expected litters and choose a model that provides enough space for kittens to move around comfortably as they grow. Larger models can accommodate bigger litters or be used for other species.
- A secure door. A secure incubator door ensures that warmth and humidity remain constant, nebulized medications are delivered correctly, and kittens do not escape.
It is also important to consider these safety and reliability features:
- Brand reputation. Invest in a reputable-brand, commercial incubator that offers consistent and precise environmental control. Avoid very cheap, low-quality incubators, which can be unreliable and even dangerous. Look for independent, online reviews. Other options include reaching out to local animal shelters, kitten rescue organizations, veterinarians, and veterinary/veterinary technician schools for recommendations based on their experiences with incubators, warranties, and customer service.
- Power loss safety. A good incubator design will ensure proper air circulation even if the power is out for a short time.
- Monitoring and stability. High-end, commercial incubators automatically maintain temperature and humidity levels. Digital displays allow precise adjustments of the levels. More advanced incubators may integrate with the Internet of Things (IoT), allowing for remote monitoring of temperature and humidity through a smartphone app. This provides real-time updates and notifications if conditions fall outside of the ideal range.
- Ventilation. Effective air circulation is critical. The incubator should have multiple vents and fans to prevent stale air from building up, which can deplete oxygen and overheat or suffocate kittens. Air vents should never be blocked. Proper airflow is essential for kittens’ respiratory health and helps minimize condensation, which when built up to the extreme, could wet and chill kittens.
- Temperature control. The primary function of an incubator is to provide a stable, temperature-controlled environment for newborn or sick neonates.
- Built-in humidification. Maintaining the proper humidity level is essential to prevent dehydration of kittens. Some models have a built-in reservoir and humidification system that automatically regulates the moisture levels in the incubator’s air.
- Nebulizing devices. A nebulizer uses pressure to convert sterile saline (ONLY use sterile saline) or liquid medication into a fine mist that is pumped into the incubator, breathed in by kittens, and delivered directly to their lungs.
- Oxygen. An oxygen concentrator provides supplemental oxygen to neonates with breathing difficulties, for example, due to pneumonia or low blood oxygen levels, known as hypoxemia. Oxygen concentrators are not typically built into kitten incubators, but many high-quality incubators include an oxygen port that allows oxygen to be delivered via tubing from the concentrator to the incubator. A separate oxygen concentrator is an additional expense.
- Sterilization. Some incubators have a built-in, UV-light sterilization system that can reduce the spread of pathogens.
- Reliability. For animal shelters, rescue organizations, veterinary/veterinary technician schools, and veterinary practices where a larger number of neonates are seen, a reliable, professional-grade incubator is a life-saving investment.
How to Set Up a Commercial Incubator
Setting up an incubator includes:
- Selecting an optimal location. Situate the incubator in an enclosed room that is quiet, with little activity, and away from direct sunlight or drafts to avoid temperature fluctuations. The room temperature should be 68-71°F/20–22°C with a humidity of 55%.
- Unpacking the incubator. Remove all parts from the box and carefully read the instruction manual before assembling.
- Preparing the interior. Use a pet-safe product to clean and disinfect the incubator. Place a soft fleece or flannel blanket on the bottom. Because kittens cannot retract their claws until they are approximately four weeks of age, avoid towels with loops to prevent claws from getting caught. A heartbeat Snuggle Kitty can be used to provide warmth and additional environmental comfort.
- Set up Filters. Filters are typically a fine plastic mesh located in a tray on a wall of the incubator. This filter protects the internal fan from dust and fur/feathers, ensuring long life and clean air circulation. Filters can be soaked in a disinfectant, rinsed, and allowed to air dry to prolong their use.
- Setting the temperature and humidity levels. Follow the instruction manual to set the desired levels.
- Providing temperature zones. Make sure there is a warmer area and a slightly cooler area within the incubator so kittens can move from one to the other if they become too cool or too warm. This is built into most commercial incubators.
- Adding water. If an incubator has a dgitally controlled humidity system, fill the pump with distilled water as indicated in the manual. Some models have an external tank that will continuously provide water for the pump. A one-gallon bottle of distilled water typically lasts for two weeks. Because the pump is pulling distilled water from the bottle via suction, it may make noise and vibrate from time to time.
- Pro tip. Rather than removing the entire cap from the bottle of distilled water, drill a hole in the cap in which to insert the tubing. It will keep the tubing more secure. Use a cord protector around the tubing that is outside of the incubator. Tubing occasionally requires replacing if here is a hole in the tubing, in which case the noise of the pump will be louder as the vacuum fails. The noise may also be louder if the water level is low or the pressure in the bottle of water is too much for the pump to handle. Remedy this by correcting the level of distilled water and releasing the vacuum by opening the bottle of distilled water.
Mechanical issues that may need troubleshooting include:
- Preventing temperature or humidity fluctuations. Ensure the incubator is placed in a room away from drafts, heat sources, and direct sunlight. Check all components for proper function. Adjust settings gradually and monitor the changes.
- Avoiding condensation. Ensure proper airflow by not overfilling the incubator with bedding. Adjust the humidity settings to avoid excessive moisture buildup.
- Addressing heating issues. If the incubator is not heating properly, check the power source, and inspect the heating element for damage. Refer to the user manual for specific troubleshooting steps.
- Replacing parts. Replace fans when they become noisy. Always ensure proper wiring and access to manufacturer-provided parts.
There is a lot more to discuss when considering temperature, humidity, nebulization, and oxygen.
Controlling Temperature
High-quality incubators use a forced-air system to provide consistent, ambient warmth throughout the enclosure. This prevents overheating and is safer than models that rely on a single light bulb, which should be avoided. The incubator should have a reliable temperature sensor/thermostat which indicates readings on the incubator’s digital display. Nevertheless, it is ideal to check the readings of the sensor/thermostat with an independent, external thermometer. Look for a model that allows you to adjust the temperature to the recommended optimal ranges for the kittens’ age. (See introduction for this information.)
A built-in thermostat regulates the temperature of the incubator, providing reliable, appropriate temperatures to accommodate neonates as they grow.
Monitoring Incubator Temperature
- Temperature calibration. A calibrated, external thermometer should be used to verify the temperature in an incubator because internal sensors on many commercial incubators, particularly budget-friendly models, can be inaccurate or inconsistent. Relying on the incubator’s built-in readout alone can lead to dangerous temperature fluctuations that can cause health problems or even death.
- Temperature variation. Depending on the incubator model, the temperature inside may not be uniform. The internal sensor may be measuring the temperature in one location, which is different from the temperature near the kittens. This can be due to the heating element not being placed in the middle of the unit or the absence of a fan to circulate air.
- Temperature consistency. The slightest fluctuations in temperature can cause stress and illness. A high-quality external thermometer can confirm that the incubator is maintaining the correct temperature. In the case of a discrepancy between the incubator’s settings and the external thermometer, rely on the external thermometer.
Using an External Thermometer
- Select an accurate thermometer. A calibrated digital thermometer with a remote probe is specifically designed to be accurate within the temperature ranges needed. Some smart thermometers can even provide remote monitoring and alerts.
- Perform the ice-water calibration test. Test the thermometer’s accuracy before use by filling a glass with a mixture of ice and water. After a few minutes, submerge the probe. If the reading is not exactly 32°F/0°C, obtain another thermometer.
- Position the probe. Place the probe sensor on the level where the kittens will be, not near the heating element or on the opposite side of the enclosure. This provides the most accurate reading of the temperature the kittens are experiencing.
- Monitor continuously. Keep the external thermometer’s display visible to look for any significant/dangerous fluctuations from the target temperature range.
Providing Humidity
The skin of neonates is thin with a large surface area to bodyweight ratio. There is only a thin layer of keratin, a protein in the skin’s outer layer, the epidermis, that forms a waterproof shield, preventing moisture evaporation from the body. Thus, the risk of dehydration is elevated in neonates. Look for a system that maintains a relative humidity of around 60% for kittens under three weeks of age and allows humidity levels to be adjusted. The incubator should continuously measure the percentage of humidity in the incubator and have a digital display that shows real-time readings of humidity, as well as temperature, in the incubator. Many modern kitten incubators have a built-in thermohygrometer that uses sensors to precisely measure, regulate, and display temperature and humidity.
Delivering Nebulization
Nebulization turns liquid medication into a breathable mist, breaking up mucus, clearing airways, and providing humidity. Nebulizers are not typically built into kitten incubators, but incubators often have ports or connections that attach to an external nebulizer. If no port is present, a small hole can be made in the wall of the incubator wall or door for the nebulizer tubing. A nebulizer that can be used for kittens may be purchased from some big-box stores, online retailers, human medical supply stores, or pharmacies with medical equipment. The size of the external nebulizer does not matter. Some newer incubator models are marketed with a built-in nebulizer.
Nebulization is often used to treat neonates with bacterial respiratory infections by mixing sterile saline with water-soluble antibiotics.
Other medications that are delivered via nebulization include:
- Bronchodilators. These help kittens breathe by relaxing the muscles around the airways in the lungs thereby allowing more air to flow into and out of the lungs, Bronchodilators can be especially helpful for kittens experiencing severe respiratory distress.
- Anti-inflammatories. Inhaled anti-inflammatories reduce swelling in the airways. They can also enhance the effectiveness of bronchodilators and reduce mucus production.
- Mucolytics: Drugs that help break down and dilute thick mucus in the lungs, aiding in its removal.
When nebulizing, unless directed otherwise by a veterinarian, always use sterile, nebulizer-grade saline solutions (0.9% sodium chloride). Never use saline intended for contact lenses, tap water, or homemade saltwater. A veterinarian should be consulted to determine if exposure to certain medications for use in kittens is safe for people.
Nebulizing frequency and duration are as follows:
- Mild cases. For mild congestion, nebulizing with sterile saline two to three times a day is a common recommendation.
- Moderate to severe cases. When medicating kittens suffering from pneumonia or severe respiratory infections, the frequency may change. When working with a veterinarian, always follow specific instructions for the correct dosage and schedule.
- Treatment duration. Nebulize for the duration prescribed by a veterinarian as nebulizing too long or frequently can worsen some respiratory conditions. The typical nebulization time is 10 to 20 minutes a session. After the nebulizer is turned off, kittens should remain in the misty incubator for another 10-20 minutes to ensure they breathe in as much aerosol as possible. Discontinue the treatment immediately if kittens remain overly distressed during nebulization because stress can compromise the benefits of the therapy. Contact a veterinarian for recommendations.
Important considerations when nebulizing are as follows:
- Ensure ventilation. The incubator should never be airtight to prevent the buildup of carbon dioxide. Restricting airflow too much can cause the incubator to overheat or deplete the oxygen, leading to suffocation.
- Watch for signs of trouble. If a kitten shows signs of increased nervousness, rapid breathing, or excessive panting or vocalizing during or after treatment, discontinue treatment immediately. Speak with a veterinarian before administering further treatments as stress can negate the benefits of nebulization.
- Make medication adjustments. If a veterinarian prescribes medication, such as antibiotics or bronchodilators, the frequency and dosage may change, or the medication itself may change, as kittens improve or worsen. Always follow the veterinarian’s instructions for the length of treatment.
- Provide reassurance. Talk calmly to kittens in a soothing voice, make the space feel safer by covering part of it with a towel to create a den, and offer a high value treat to distract and reward kittens who are old enough to eat.
- Recognize improvement. Gauge the success of the treatments by watching for increased activity and appetite and reduced sneezing and nasal discharge.
Steps to prepare the nebulizer include:
- Making sure the incubator is clean and ready for use.
- Setting up nebulizer as directed by your veterinarian.
- Placing the kitten inside the incubator and turning on the nebulizer to fill the incubator with a fine mist. Littermates can be nebulized together. Clean and disinfect all nebulizer parts thoroughly, per the manufacturer’s instructions, after each use to prevent the growth of bacteria, mold, and other microorganisms.
Maximize the nebulizing experience by doing the following:
- Place the nebulizer some distance from the incubator to minimize noise and vibration.
- Nebulize at the same time each day to accustom kittens to the routine. Predictability can reduce stress.
- Never leave kittens unattended during nebulization. Monitor their breathing and body language to observe for any undue stress or side effects.
Physical signs of stress include:
- Ears pinned back or flattened against the head.
- Eyes wide open and large pupils.
- Crouching, arching the back, or appearing tense and frozen.
- Tail tucked tightly against the body or thumping/swishing vigorously.
- Rapid lip or nose licking.
Behavioral signs of stress include:
- Increasing vocalizations, such as meowing, crying, yowling, hissing, or growling.
- Hiding inside the incubator or actively pushing against the sides to get out.
- Pacing or an inability to settle down.
- Trying not to breathe in order to avoid inhaling the mist.
- Swatting, biting, or scratching may indicate fear or feeling cornered.
Signs of physical and respiratory stress include:
- Breathing and panting (short, quick breathing) excessively with an open mouth.
- Increasing heart rate.
- Drooling or foaming excessively.
- Vomiting and diarrhea, which may not occur immediately.
The main risks of nebulization include:
- Bacterial contamination and secondary infection. Nebulizers require proper cleaning after every use to prevent the growth of bacteria, mold, or other microorganisms. If these pathogens are nebulized, they can cause a more severe secondary infection, which can be extremely harmful to kittens whose respiratory system is already compromised.
- Contaminant inhalation. Contaminated water or the use of solutions other than sterile saline can result in harmful microorganisms being inhaled, increasing the risk of respiratory problems.
To decrease the risk of contamination, disassemble the nebulizer, and follow the manufacturer’s instructions to thoroughly clean and disinfect all reusable nebulizer parts after every use. Prevent bacterial growth by allowing all parts to completely air dry.
Other risks of nebulization include:
- Overheating and reduced ventilation. A container, carrier, or incubator should not be fully sealed if it is used as a nebulizer chamber. An airtight incubator is dangerous for kittens because it can cause the temperature to rise too high and reduce ventilation. A poorly ventilated incubator can harbor infections and irritants.
- Stress and anxiety. The unfamiliar confined space of an incubator, the noise of a nebulizer, and the fine mist can frighten and stress kittens. These can worsen their respiratory distress and complicate treatment. For skittish kittens, slowly introduce the nebulizer to reduce anxiety. If possible, place the nebulizer some distance away from the chamber to minimize noise and vibration.
Risks associated with medication/s include:
- Incorrect medication. Certain medications are not appropriate for nebulization or for kittens and can cause severe harm.
- Adverse drug reactions. Although very uncommon, some kittens may have a negative reaction to a medication/s. These can include a rapid heart rate, nervousness, or excessive panting. It is critical to monitor kittens closely during treatment and report any negative signs to the veterinarian who prescribed treatment.
- Incorrect dosage. An overdose of certain medications can have serious side effects such as a rapid heart rate, nervousness, and elevated blood pressure. If the wrong amount or concentration of medication/s is administered, treatment can be ineffective or toxic. Kittens are highly sensitive to medication due to their small size and underdeveloped immune systems.
- Personal safety. Exposure to certain medications may be harmful to people.
Oxygen Therapy
Conditions that may require oxygen therapy include:
- Aspiration pneumonia. This illness occurs when kittens inhale fluids, most commonly kitten milk replacement formula (although liquid medications or stomach contents can also be inhaled) into their lungs. This may result from feeding kittens on their back, force feeding, feeding too quickly, or cleft palate. Aspiration can cause inflammation and possible infection of the lungs and be fatal in kittens, especially without prompt and aggressive treatment. Learn more about aspiration pneumonia.
- Congenital defects. Heart conditions, such as ventricular septal defect (“hole in the heart”), impair the heart’s function. This can lead to congestive heart failure and fluid accumulation in the lungs, causing breathing difficulties.
- Fading kitten syndrome. This condition has various causes and can result in rapid decline and death. Contributing factors can include low birth weight and insufficient maternal care, which can lead to poor oxygen levels. Learn more about fading kitten syndrome.
- Dystocia (difficult birth). Complicated or prolonged labor can lead to oxygen deprivation in kittens.
- Severe hypothermia can depress the nervous and respiratory systems, causing slow, shallow breathing and potential cardiorespiratory failure. Placing a microwavable disc in the incubator under the fleece/flannel bedding can help warm a neonate who is very cold. Learn more about hypothermia.
- Untreated upper respiratory infections caused by viruses (e.g., herpesvirus or calicivirus), bacteria, fungi, or parasites can lead to pneumonia and inflammation and infection of the lungs.
- Feline Infectious Peritonitis (FIP). The “wet” form of this viral disease can cause fluid buildup in the chest cavity, compressing the lungs.
- Systemic bacterial infections (septicemia). These can overwhelm the underdeveloped immune system of kittens and adversely affect multiple organs, including the lungs.
DIY Incubators
When a commercially available incubator is not an option, a DIY incubator may be considered. There are several reasons for considering a DIY incubator, such as not fostering many at-risk neonatal kittens, lack of funding to purchase a commercial incubator, or inability to purchase a commercial incubator due to location. DIY incubators are more easily transported, because they are not as bulky or heavy as commercial incubators and do not rely on an electrical source. Even if one has a commercial incubator, a DIY incubator can serve as a backup if there are disruptions in electricity. It should be noted that a DIY incubator is NOT the recommended incubator of choice but can be used as an alternative.
A DIY incubator is not difficult or expensive to make, and the materials are readily available. A container in which to place kittens could be a transparent plastic storage bin with high sides that allows the kitten/s to be observed but not climb out, a plastic pet carrier that can be closed and opened from the front and top, or even a cardboard box with high sides. If cardboard boxes are used, they should be replaced when soiled. Fabric enclosures may be difficult to clean or disinfect while caring for a kitten, several kittens, or between litters.
Setting up a DIY incubator includes:
- Preparing the space. Locate the incubator in a quiet, draft-free area that is not in direct sunlight. Cover the top of the container with a heavy towel or other material.
- Selecting a heating source. It is vital that kittens can move off the heat source (see options later in the article) so they do not become overheated or dehydrated. Thus, the heat source should only occupy half the container’s bottom.
- Covering the heat source. Fleece or flannel pre-washed in fragrance-free detergent that has not been exposed to drying sheets should cover the heat source as well as the rest of the bottom of the incubator. If the cover of the heat source is to be laundered, use a fragrance-free detergent. Do not use dryer sheets.
- Adding a digital thermometer. Make a small hole in the container; make the hole from the inside out and sand any sharp edges. Insert the thermometer probe on the bottom of the container where the kittens will be resting. The thermometer is attached to a small digital display that is placed outside the container.
- Adding humidity (optional, power source required). Make a small hole in top of the container, and pass humidified tubing into the incubator. When providing humidity, a two-in-one thermohygrometer that measures both temperature and humidity is required.
- Providing nebulization. A nebulizer can be added by creating a place for the nebulizer to enter the incubator as previously described in the commercial incubator section.
- Monitoring the temperature consistently. The heat source should be rewarmed as needed to maintain the appropriate temperature.
There are several options when it comes to a heat source. Each has it pros and cons, including:
- Warming discs. Microwavable warming discs are designed to stay at a safe, consistent temperature for up to eight hours after being microwaved. It is extremely important to check the disc after removing it from the microwave to ensure the disc has not become too hot. Some warming discs can overheat if not completely cool when put in the microwave, which can cause the disc to warp or break. The discs are compact and easy to keep on hand for travel, disruptions in electricity, or emergencies. More than one disc may be required if caring for multiple kittens. Many discs come with a removable cover. Covering a warming disc is very important because they prevent the kittens from being burned by the discs. The covers and discs can be disinfected, making them very cost effective. If a cover is not used, make sure the warming disc is placed under layers of fleece bedding and the kitten cannot burrow underneath and contact the disc directly. Follow the manufacturer’s recommendations for cleaning and disinfecting their product. When laundering the cover, use fragrance-free detergent and do not use dryer sheets.
- Electric heating pads. When considering an electric heating pad, it is important to get one that does not turn off automatically. Look for a pet-specific heating pad, which often has options for lower heat settings, with a cover that can be removed and disinfected. Heating pads for people can get dangerously hot and cause thermal burns. Although heating pads come with a cover, kittens should never be placed directly on a heating pad. It should be covered with a fleece or flannel fabric. Follow the manufacturer’s recommendations for cleaning the cover and heating pad. It is important to locate the electrical cord as far outside the container as possible to prevent a kitten from getting tangled in it or strangled. Electric heating pads can also be plugged into a vehicle’s cigarette lighter for use when transporting kittens; the heating pad must be made specifically for cars and operate on 12V. Alternatively, a power inverter can convert a vehicle’s DC power to AC power. Inverters connect to the car’s electrical system via a cigarette lighter port or directly to the battery terminals. Once the inverter is plugged into the cigarette lighter, a heating pad can be plugged into the inverter’s standard AC outlets. Because the inverter draws power from the car battery, it is best to use the inverter while the engine is running or for short periods of time when the engine is off to prevent draining the battery.
Caring for Kittens in Incubators
Chilled kittens must be warmed before they are fed to manage hypothermia (low body temperature) and hypoglycemia (low blood sugar); both conditions can lead to decreased heart and respiratory rates, cardiovascular failure, and death. Only once kittens are warm will they be able to digest formula.
The following considerations should be noted when caring for kittens in incubators:
- Minimize time outside the incubator. Do as much as possible for the kittens while they are in their incubator. Once cold kittens have warmed up, it is important to do as thorough an exam as possible to detect any observable life-threatening issues. Learn more about assessing a kitten’s health. Kittens are regularly fed and toileted in the incubator to prevent sudden change in environmental temperature. Feeding and toileting should occur on a set schedule according to the age of the kitten.
- Monitor temperature. Frequently check the temperature and humidity to ensure they remain at appropriate levels. If kittens are huddled together in a tight pile, the incubator may be too cold; if spread far apart, the kittens may be too warm. If positioned in a straight line, the temperature may be just right.
- Weigh kittens daily. Use a scale that weighs in grams because it offers much finer increments and makes tracking kitten weights more accurate. Neonatal kittens may require weighing before and after each feeding, but all kittens should be weighed at least once a day, preferably at approximately the same time every day. Consistent weight gain is a good sign, whereas failure to gain weight or weight loss may be the first indication of a problem that requires addressing. Log weights on a chart. Other information to log may include when the kitten has urinated and defecated and the appearance of the eliminations; the activity level of the kitten, such as active, lethargic, crying; and the presence of respiratory distress, sneezing, coughing, vomiting, or ocular and nasal discharge.
- Watch for distress. A chilled kitten will be lethargic and cool to the touch. This is a medical emergency.
- Maintain kitten cleanliness. As often as needed, but at least twice weekly, gently clean orphaned kittens with a warm, soft, moistened wash cloth. Wash hands thoroughly before and after handling kittens.
- Maintain incubator cleanliness. Use a kitten-safe cleaner and a clean, lint-free cloth to immediately wipe up any spills, urine, or feces to help prevent bacteria from multiplying. Follow up by using a kitten-safe disinfectant, such as Rescue. Kittens will need to be removed from the incubator for any deep cleaning and should be placed on an alternative heat source until the cleaner has dried, and it is safe to return them to the incubator.
- Provide socialization. While the incubator provides physical support, kittens also need human contact. After they have reached three weeks of age and can be handled beyond feeding and stimulation, give them plenty of snuggles and petting on a heating source to encourage proper socialization. Keeping kittens together is best for their physical and behavioral development. If kittens need to be separated due to cross-sucking, dividers can be purchased that allow for proper air and heat flow, but still allow kittens to see and smell one another.
Proper Maintenance of Incubators
Consistent maintenance of an incubator, including diligent cleaning, regular disinfecting, and mechanical checks, is critical to ensure the health of neonates. Key maintenance tasks include daily cleaning, weekly sterilization, careful temperature and humidity control, and routine checks of all components. These include:
- Using a kitten-safe cleaner/disinfectant and a clean, lint-free cloth to immediately wipe up any spills, urine, feces, or vomit to help prevent bacteria from multiplying.
- Replacing soiled bedding and heat source covers.
- Checking temperature and humidity levels inside the incubator multiple times a day using a reliable digital thermohygrometer.
- Ensuring that the heat source only covers a portion of the floor space, allowing kittens to move to a cooler area if they need to. Never force kittens to stay in one spot.
Weekly and biweekly maintenance includes:
- Emptying, cleaning, and disinfecting the humidifier’s water tray at least once a week. Refill with fresh, sterile distilled water to prevent mineral buildup and mold growth.
- Cleaning the incubator’s interior, including removable trays, shelves, and door seals with a noncorrosive disinfectant and a lint-free cloth; use a toothbrush for hard-to-reach areas. If daily cleaning has been done properly, a deep clean/disinfection is rarely needed for kittens under two to three weeks of age.
- Removing bedding or other items and laundering them regularly with fragrance-free detergent. Do not use dryer sheets.
Weaning Kittens from the Incubator
Healthy kittens are ready to leave an incubator when they are at least three to four weeks old and able to regulate their own body temperature. At this age, they are larger, growing fast, and more mobile and curious. These factors indicate the need for a larger space for physical and behavioral development. At this time it is best to move the kittens to a small space such as a playpen or large crate. Continue to provide a heat source such as a warming disc until you notice that the kittens no longer utilize the source.
Proper Cleaning and Disinfection of Incubators Between Kitten Litters
Proper cleaning and disinfection of incubators between kitten litters includes:
- Removing all bedding and toys and discarding those items that cannot be laundered or cleaned and disinfected.
- Referring to the manufacturer’s user manual for specific cleaning/disinfecting instructions and maintenance recommendations.
- Disconnecting the electrical cord, taking out all removable parts.
- Washing the components with soapy water, gently scrubbing away any visible debris. Disinfect all parts with a kitten-safe product. Never use strong chemicals that produce volatile organic compounds (VOCs); these fumes can be harmful to kittens. Also avoid chlorine bleach, which can corrode stainless steel, alcohol-based cleaners, which can damage plastic, and products with phenol, which is highly toxic. Use a product such as F10, a diluted bleach solution (1:100 ratio), or Rescue.
- Rinsing all components completely with clean water to remove any chemical residue.
- Cleaning fans and heating elements of any debris, such as fur or dust, with compressed air.
- Allowing all parts to air-dry completely before reassembly. Introducing damp parts can promote mold and bacteria growth. Some incubators have a “drying cycle” setting, or the incubator can be run for a few hours after reassembling to ensure all moisture is gone.
- Changing or cleaning all filters as previously discussed.
- Reassembling the incubator, once completely dry, for the next kitten/s, and storing it in a cool, dry place to prevent damage and avoid losing essential components.
Neonatal kittens, especially those at risk, need round-the-clock care, and incubators can make all the difference in increasing their survival rates. Here’s to the dedicated, sleep-deprived kitten caregivers whose labor of love helps save more kittens.
Resources
Playing Mum, Successful management of orphaned kittens (JFeline Med Surg.2013 Feb 19;15(3):201–210.)
The effects of temperature, relative humidity, and nocturnal and diurnal feedings on feed intake, growth rate, and health in orphaned neonatal kittens (UC Davis Veterinary School)
Temperature and Humidity Monitoring System Environmental Cat Incubator Based on the Internet of Things (IoT) †Reviews of Incubators (Proceedings 2022, 83(1), 50;)