Share this resource or email it to a friend!
It’s finally summer. Fun-in-the-sun time.
Not so fast. Even if hurricanes, floods, wildfires, earthquakes, tornados and other natural disasters aren’t common where you live, you could experience chemical spills or even a house fire. Before you let your hair down, it’s important to have an emergency plan for you and your feline family members. NEVER leave a pet behind, even with food, water and a litter box. Officials may say you won’t be gone long, but you may not be able to return quickly once you’ve evacuated.
Step 1. Accustom your cat/s to carriers.
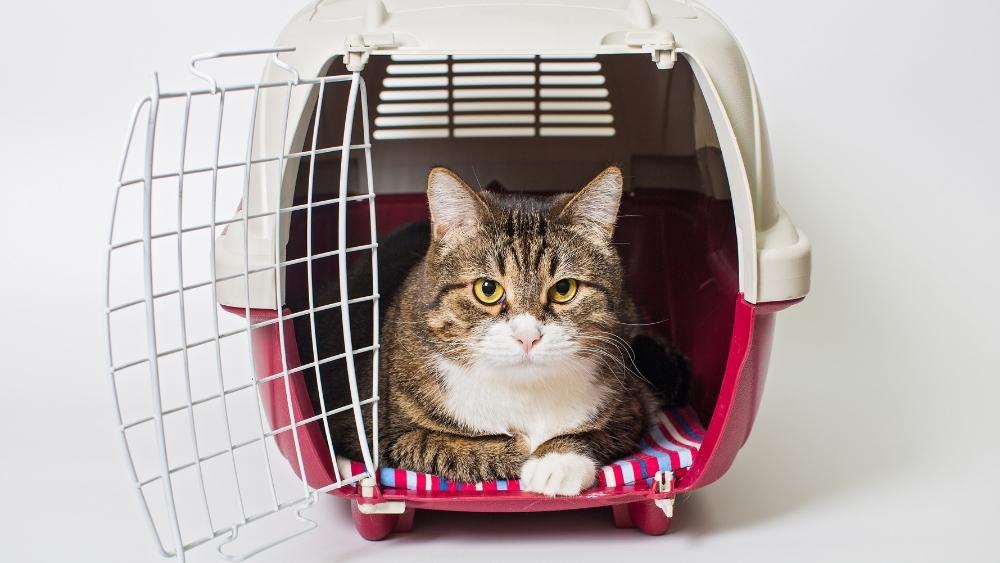
Cats typically run and hide when they see the carrier because it usually means a ride in the car and a visit to the veterinarian. Change your cat’s perception of the carrier from run to fun. Leave the carrier in the house with a soft fleece blanket and hide treats in it from time to time. Be sure the door can’t shut and inadvertently trap your cat inside.
Have as many carriers as you have cats and, if the carriers aren’t out all the time, make sure you can get to them quickly. Transporting cats in carriers will prevent escapes should they panic. Attach a tag to each carrier with your contact information and your emergency caretaker’s information.
- Tip: A collapsible, soft-sided cat pen, that can accommodate your cat, food and water dishes and a litter box could make your cat more comfortable if continued confinement is required.
Step 2. Be sure your cat wears a properly fitted breakaway collar with visible ID, and have your cat microchipped.
Always provide the microchip registry with your current contact information. In addition, provide your microchip registry with the names and contact information of relatives, friends or neighbors who have agreed in advance to temporarily care for your cat/s if you are unable to do so.
- Tip: In addition to engraving the ID tag with your phone numbers on one side, include your pet’s microchip number and the phone number of the registry on the other side.
Step 3. Keep your cat’s vaccines up to date for your pet’s wellbeing and because evacuation shelters may require proof of vaccination, especially rabies. If you don’t already have dozens of photos on your phone, take some face and body views. You may need to use these to create lost cat flyers.
- Tip: Create lost cat flyers in advance so you have them in case you need them.
Step 4. Have an emergency bag/box. Assemble your must-have cat items and store them somewhere you can easily grab them. Include: a harness and leash; dishes; a 3-day supply of food and litter; a litter box, scooper and poop bags; medication; medical records; a gallon container of water.
- Tip: If any of these fit in the carrier pockets, that’s a good place for them. Set up a reminder system to replace any items that might go bad.
Step 5. Prepare a list of all the things you need to do to evacuate and place it on the refrigerator. In a panic, it may be hard to remember what to do.
Be sure to have the microchip registry contact information on your emergency list and the names and numbers of local veterinary clinics, emergency animal clinics and pet-friendly hotels. If you’ll need to stay at a hotel, make a reservation as soon as you know you may have to evacuate; hotels may fill up quickly.
- Tip: Include the names, addresses, email, and phone numbers of people who have agreed in advance to house you and your pet/s.
Step 6. Know your cat’s favorite hiding spot/s. Everyone in the household should know these spots. If there are multiple family members and multiple floors, assign several people to look — one on each floor. Have another person gather the carriers in one spot.
- Tip: Train your cat to come to sound of you shaking the treat container. You can also train your cat to come to a whistle, which you keep on your key chain. There may be alarms and noises that prevent your cat from hearing your voice or the rattling treats. You can also blow the whistle in a disaster’s aftermath.
- Tip: Keep a treat container and whistle near your front door that neighbors/friends can use to “call” your cat/s.
Step 7. Give your neighbors a spare house key. Introduce them to your cats, and inform them where your cats hide, how to find their carriers and where you’ve placed emergency supplies. Be sure they know where to find your emergency instructions.
- Tip: Be certain all spare keys work before distributing them to neighbors and friends who have agreed to help your cat/s if you can’t.
Step 8. Inform rescuers that you have pets. Have an up-to-date wallet alert card with your pets’ names and descriptions, contact information for you and an emergency caretaker. Place a static cling pet rescue alert decal on all entry doors, date it, and keep it up to date.
- Tip: If you have fosters, be sure to include them as well on your wallet alert card and decal.
Step 9. Include other useful items in your emergency bag/box, such as duct tape to repair a torn carrier, garbage bags, paper towels and baby wipes, toys, comb and brush and odor/stain neutralizer.
Hopefully, you will never need to evacuate. But if you do, being prepared may be the difference between life, injury or worse for your beloved cat/s.


